
Every product is independently reviewed and selected by our editors. If you buy something through our links, we may earn an affiliate commission at no extra cost to you.
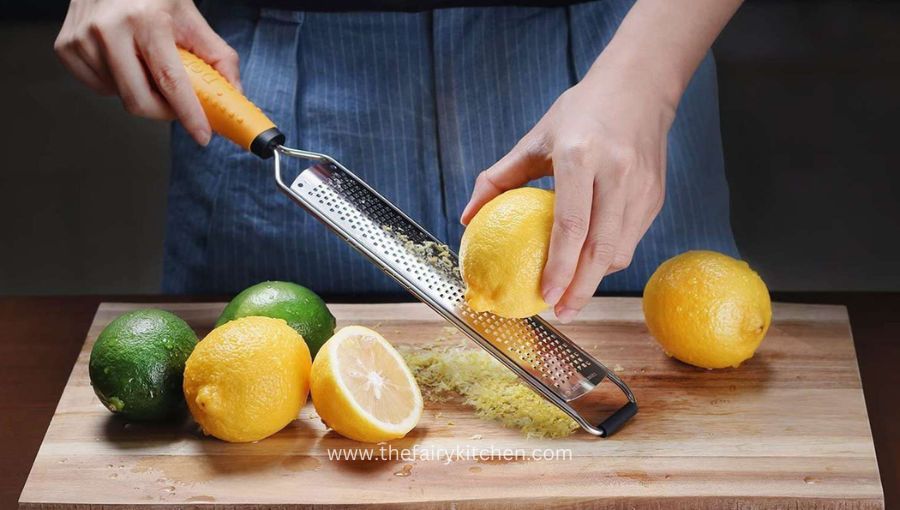
Lemon zest is a fantastic way to elevate the flavors in your culinary creations, adding a bright and citrusy essence to both sweet and savory dishes.
However, grating lemon zest can leave your grater with stubborn residue that can be tricky to clean.
Here’s a guide on how to effectively clean a grater after zesting lemons, ensuring it remains in top condition for future use.
Simple Tools You’Ll Need For An Effective Clean
Cleaning a grater after zesting a lemon is essential to maintain its quality and ensure optimal performance every time you use it. With the right tools and a little know-how, cleaning a grater can be a quick and hassle-free task.
Here are the simple tools you’ll need to effectively clean your grater:
- Dish soap: A mild dish soap will help break down any residual oils or food particles on the grater.
- Cleaning brush: A small cleaning brush with soft bristles will help remove stubborn residue without damaging the grater’s surface.
- Sponge or cloth: A sponge or cloth can be used to apply the dish soap and help remove dirt and grime.
- Toothbrush: A toothbrush is handy for cleaning hard-to-reach areas, such as the crevices between the grater’s teeth.
- Warm water: Warm water is ideal for rinsing off the grater after cleaning.
Now let’s dive into the details of how to clean a grater using these tools:
Preparing The Grater For Cleaning
Before you begin the process of cleaning your grater for lemon zest, it’s important to prepare it properly. This will help ensure that the grater is free from any leftover food particles and ready for a thorough clean.
Here are the key steps to follow:

Removing Any Leftover Food Particles
To ensure effective cleaning of your grater, it is essential to remove any residual food particles. This step is crucial as it helps prevent the transfer of flavors and potential contamination.
Follow these guidelines to remove any leftover food particles:
- Carefully inspect the grater and use a soft brush or toothbrush to loosen any stuck-on food.
- Hold the grater under running water and use your fingers or a utensil to gently scrape away any remaining particles.
- For stubborn bits, you can also use a toothpick or a small brush to dislodge them.
- Be cautious while cleaning, as the grater’s sharp edges can cause injury. Always keep your fingers away from the cutting surface.
Getting The Grater Ready For A Thorough Clean
Once you have removed all the leftover food particles, it’s time to get the grater ready for a thorough clean. This will ensure maximum cleanliness and maintain the lifespan of your grater.
Follow these steps to prepare the grater:
- Fill a sink or basin with warm water and add a few drops of dish soap.
- Submerge the grater in the soapy water and allow it to soak for a few minutes. This will help loosen any remaining residue.
- Use a soft sponge or cloth to scrub the grater thoroughly. Make sure to pay attention to the sharp edges and grooves, as these areas can trap stubborn debris.
- Rinse the grater with clean water to remove any soap residue.
- Finally, inspect the grater to ensure it is free from any dirt or soap, and pat it dry with a clean towel.
By following these steps, you can ensure that your grater is clean, ready, and safe to use for zesting lemons or any other ingredients.
Cleaning your grater regularly not only maintains its hygiene but also enhances the quality and flavor of the food you prepare.
So, take the time to prepare your grater properly before cleaning it thoroughly.
Basic Cleaning Method
Graters are a versatile kitchen tool that can be used for various purposes, including grating lemon zest to add flavor to your dishes.
However, cleaning a grater can be a bit tricky due to its sharp blades and the small holes that tend to trap food particles.
In this section, we will discuss the basic cleaning method for a grater used specifically for lemon zest.
Follow these step-by-step instructions to ensure your grater is clean and ready for future use.
Step-By-Step Instructions For A Basic Clean
Rinse the grater: Start by rinsing the grater under warm running water to remove any loose food particles or residue. This will make it easier to clean the grater thoroughly.
Wash with mild detergent: Apply a small amount of mild detergent to a sponge or brush and gently scrub the grater. Make sure to clean both sides of the grater, ensuring that all the holes are thoroughly cleaned.
Pay attention to the handle: Don’t forget to clean the handle of the grater as well, as it may have come into contact with food and oils during use. Simply wipe it down with the soapy sponge or brush.
Use a non-abrasive brush: If there are any stubborn food particles stuck in the grater’s holes, use a non-abrasive brush to gently scrub them away. Avoid using steel wool or any other abrasive materials, as they can damage the grater’s surface.
Pay extra attention to the backside: Don’t neglect the backside of the grater. While it may not have as many holes as the front, it can still accumulate food particles. Give it a thorough cleaning using the sponge or brush.
Rinse thoroughly: After scrubbing the grater, rinse it under warm running water to remove any soap residue. Make sure all the detergent is thoroughly rinsed off before proceeding to the next step.
Dry completely: Pat the grater dry with a clean towel or leave it to air dry. Moisture can lead to rust or the growth of bacteria, so it’s important to ensure the grater is completely dry before storing it.
Inspect for any remaining residue: Take the time to inspect the grater and make sure there are no remaining food particles or residue. If you spot any, repeat the cleaning process until the grater is clean and free of debris.
By following these simple steps, you can keep your grater clean and ready for the next time you need to zest a lemon or tackle any other grating task in the kitchen.
Remember to clean your grater immediately after use to prevent food from hardening and becoming more difficult to remove.
Techniques For Tackling Tough Stains On The Grater
Grating lemon zest is a fantastic way to add bright, citrusy flavor to your dishes. However, it’s not uncommon for the grater to develop stubborn stains over time.
If you’re wondering how to get your grater looking clean and pristine again, don’t worry – we’ve got you covered!
With a few simple techniques and natural remedies, you’ll have your grater looking brand new in no time.
Let’s dive in:
Baking soda method
- Sprinkle a generous amount of baking soda onto the stained areas of the grater.
- Use a damp cloth or sponge to gently scrub the baking soda onto the stains, applying a bit of pressure.
- Rinse the grater with warm water, making sure to remove all traces of baking soda.
- Dry the grater thoroughly before storing it away.
Lemon juice solution
- Squeeze the juice of a fresh lemon into a bowl or container.
- Dip a clean cloth or sponge into the lemon juice and rub it onto the stained areas of the grater. The acidity of the lemon juice helps break down the stains.
- Allow the lemon juice to sit on the grater for a few minutes.
- Rinse the grater with warm water, removing all remnants of the lemon juice.
- Dry the grater completely before using or storing it.
Vinegar soak
- Fill a bowl or container with white vinegar.
- Place the grater in the vinegar, making sure the stained areas are submerged.
- Allow the grater to soak for about 15-20 minutes.
- Remove the grater from the vinegar and scrub it gently with a sponge or brush to remove any loosened stains.
- Rinse the grater with warm water to remove any lingering vinegar smell.
- Dry the grater thoroughly before using it again.
Dish soap and warm water
- Fill a sink or basin with warm water and add a few drops of dish soap.
- Place the grater in the soapy water and let it soak for a few minutes.
- Use a sponge or brush to scrub away the stains, focusing on the affected areas.
- Rinse the grater thoroughly with warm water until all soap residue is gone.
- Dry the grater completely before storing it.
Toothbrush method
- Grab an old toothbrush that has soft bristles.
- Wet the toothbrush and apply a small amount of dish soap to the bristles.
- Gently scrub the stained areas of the grater using the toothbrush in a back-and-forth motion.
- Rinse the grater with warm water to remove any soap or residue.
- Dry the grater thoroughly before using it again.
With these techniques in your arsenal, you can tackle even the toughest stains on your grater with ease. Keep your grater clean and well-maintained to ensure it lasts for years to come. Happy grating!
Tips For Safely Scrubbing The Grater To Remove Stubborn Residue
Cleaning a grater after zesting lemon can be a bit of a challenge. The small holes of the grater tend to trap stubborn residue, making it difficult to clean.
However, with the right techniques and tools, you can keep your grater sparkling clean and ready for your next culinary adventure.
Here are some tips for safely scrubbing the grater:
Use a brush or sponge: A brush or sponge is the most effective tool for scrubbing a grater. Its bristles can reach into the small holes and remove any trapped residue.
Opt for a brush with firm bristles or a sponge with a rough surface to ensure thorough cleaning.
Start with hot, soapy water: Before you begin scrubbing the grater, soak it in hot, soapy water for a few minutes. This will help loosen the residue and make it easier to remove.
Make sure to use a mild dish soap that is safe for your grater’s material.
Scrub in the right direction: When scrubbing the grater, it’s important to go in the same direction as the grating motion. This helps prevent any accidental injuries from the sharp edges of the grater.
Use gentle pressure and avoid scrubbing too vigorously to prevent damaging the grater.
Use a toothbrush for stubborn spots: If there are any stubborn spots or residue that won’t come off with a brush or sponge, try using a toothbrush.
The small bristles can effectively scrub away the residue without scratching the grater’s surface. Apply a little bit of dish soap or baking soda to the toothbrush for added cleaning power.
Rinse thoroughly: After scrubbing the grater, rinse it thoroughly under running water to remove any soap or residue. Ensure that all the holes are clean and free from any debris.
A small handheld spray nozzle or a gentle stream of water can be helpful in reaching all the crevices.
Dry completely: Before storing the grater, make sure it is completely dry. Moisture can cause rust or mold to develop on the grater.
Use a clean towel to dry the grater thoroughly, paying extra attention to the holes to remove any remaining moisture.
Cleaning a grater may require a little bit of time and effort, but it’s crucial for maintaining its functionality and prolonging its lifespan.
By following these tips, you can easily remove stubborn residue and keep your grater in excellent condition for years to come.
Techniques For Cleaning The Small Crevices And Corners Of The Grater
Use a toothbrush or small cleaning brush:
These tools are perfect for reaching the nooks and crannies of your grater. Follow these steps for effective cleaning:
- Wet the toothbrush or cleaning brush with warm soapy water.
- Hold the grater firmly, ensuring the sharp side faces away from you.
- Gently scrub the small crevices and corners of the grater using the toothbrush or cleaning brush.
- Pay extra attention to the areas where stubborn bits of zest or other food particles may be stuck.
- Rinse the grater thoroughly with warm water to remove any leftover soap residue.
- Dry the grater completely before storing it.
Baking soda and water paste:
If you’re dealing with dried-on food particles on your grater, this simple paste can work wonders. Here’s how to make and use it:
- Mix equal parts of baking soda and water in a small bowl to create a thick paste.
- Apply the paste to the grater, focusing on the hard-to-reach areas.
- Let it sit for a few minutes to allow the paste to loosen the grime.
- Use a toothbrush or cleaning brush to scrub the paste gently into the crevices and corners.
- Rinse the grater thoroughly with warm water to remove any residue.
- Dry the grater completely before storing it.
Vinegar solution
Vinegar is a natural cleaning agent that can help remove stains and residue from your grater. Follow these steps to use vinegar effectively:
- Fill a bowl with equal parts white vinegar and warm water.
- Submerge the grater in the vinegar solution, ensuring all the crevices and corners are covered.
- Let it soak for about 10-15 minutes to allow the vinegar to break down the grime.
- Use a toothbrush or cleaning brush to scrub the remaining residue, focusing on the hard-to-reach areas.
- Rinse the grater with warm water to remove any vinegar smell.
- Dry the grater completely before storing it.
Dishwasher-safe graters
If your grater is dishwasher safe, you can opt to clean it in your dishwasher. However, keep in mind that the dishwasher might not reach all the small crevices and corners effectively.
It’s recommended to hand wash and follow any specific care instructions provided by the manufacturer.
Regular maintenance
To prevent stubborn buildup and make cleaning easier in the long run, it’s essential to clean your grater immediately after use.
Use a brush or scraper to remove any zest or food particles, and rinse it under warm water. Dry it thoroughly before storing.
Now that you have these handy techniques, cleaning the hard-to-reach areas of your grater for lemon zest will be a breeze!
Keep your grater in top shape, and enjoy the fresh flavors of citrus zest in your dishes without any worries.
Proper Techniques For Ensuring Your Grater Is Completely Dry
When it comes to cleaning your grater after zesting lemons, drying it thoroughly is just as important as the cleaning process itself. Proper drying techniques not only prevent rusting but also ensure the longevity of your grater. Here are some key points to keep in mind:
- Pat dry with a clean towel: Once you have thoroughly washed your grater with warm soapy water, make sure to pat it dry with a clean towel. This will help remove any excess moisture and prevent water spots from forming.
- Air drying: After patting your grater dry, allow it to air dry naturally. This will help ensure that all the nooks and crevices are free from any moisture. Place it on a clean dish rack or lay it flat on a clean kitchen towel.
- Use a hairdryer: If you’re short on time and need to speed up the drying process, you can use a hairdryer on a low or cool setting. Ensure that you hold the hairdryer a few inches away from the grater to avoid causing any damage.
- Avoid using a cloth: While it may be tempting to use a cloth or paper towel to dry your grater, avoid doing so. Fibers from the cloth can get caught in the grater’s teeth, making it difficult to remove and potentially compromising its cleanliness.
- Store in a dry place: Once your grater is completely dry, store it in a dry place away from moisture. Moisture can contribute to rust formation, so it’s essential to find a storage location that is well-ventilated and free from any water buildup.
By following these proper techniques for drying your grater, you can keep it in optimal condition and ensure that it’s ready for your next lemon zesting session. Remember, a dry grater is a happy grater!
Tips For Keeping Your Grater Clean And In Good Condition
Regular cleaning routines and storage practices can go a long way in prolonging the lifespan of your grater. Follow these tips to ensure your grater stays in optimum condition:
Clean it immediately after use: Don’t let leftover zest or food particles dry and harden on your grater. Clean it as soon as you finish using it to prevent a stubborn residue from forming.
Use warm soapy water: Start by rinsing the grater under warm water to remove any loose particles. Then, use a soft sponge or brush and mild dish soap to thoroughly clean the grater. Make sure to get into all the nooks and crannies.
Be gentle: Avoid using abrasive scrubbers or harsh cleaning agents on your grater, as they can damage the surface and affect its performance. Stick to soft materials and gentle scrubbing motions.
Clean in the right direction: When cleaning your grater, always scrub in the same direction as the grating surface. This helps remove any residue and prevents accidentally harming yourself.
Remove stubborn stains: If your grater has stubborn stains, sprinkle some baking soda on a damp sponge and gently rub the affected area. The baking soda acts as a natural abrasive and helps lift the stains without damaging the grating surface.
Dry thoroughly: After washing, dry your grater with a clean towel to prevent moisture from causing rust or corrosion. Make sure to also dry any crevices or grooves where water may have collected.
Regular Cleaning Routines And Storage Practices
In addition to proper cleaning techniques, establishing regular cleaning routines and storage practices can help maintain your grater’s quality over time.
Consider the following suggestions:
Clean after each use: Avoid leaving the grater unwashed for extended periods. Make it a habit to clean it after every use, even if it’s just a quick rinse under running water.
Store it properly: Find a dedicated space in your kitchen for your grater, and store it in a way that protects the grating surface. Consider using a protective cover or keeping it in a drawer to prevent accidental damage.
Keep it separate: Avoid storing your grater with other kitchen utensils that may scratch or scrape against it. Maintaining a separate space for your grater helps ensure its longevity.
Sharpen when needed: Over time, the sharpness of the grating surface may diminish. Invest in a grater sharpening tool or consult a professional knife sharpener to bring back its original sharpness.
Inspect for damage: Routinely check your grater for any signs of wear and tear, such as bent or broken teeth. Replace it if necessary to prevent any potential hazards or compromised performance.
By following these simple tips, you can keep your grater clean, sharp, and ready for all your lemon zest needs. A well-maintained grater will not only enhance your cooking experience but also ensure your dishes are infused with the vibrant flavors of fresh citrus zest.
Exploring Alternative Ways To Clean A Grater For Lemon Zest
Cleaning a grater after using it for lemon zest can be a challenging task. The tiny grates tend to trap sticky lemon residue, making it difficult to remove. While traditional methods like using a brush or running it under water can work, there are alternative cleaning methods that might surprise you.
Let’s take a look:
Aluminum foil scrub:
Crumple a piece of aluminum foil into a ball and use it to scrub the grater. The rough surface of the foil will help loosen any stuck-on lemon zest. Rinse the grater with warm water afterwards.
Bread cleaning:
Take a stale piece of bread and press it firmly against the grater. The bread will catch the lemon zest and remove it from the grates. Dispose of the bread once it has collected all the residue.
Toothbrush scrub:
Use a clean, unused toothbrush to scrub the grater. The bristles will reach into the tiny grates and remove any lingering lemon zest. This method works well when combined with warm soapy water.
Vinegar soak:
Fill a bowl or basin with equal parts water and white vinegar. Submerge the grater in the mixture and let it sit for 15-20 minutes. The acidic nature of vinegar helps break down the lemon residue, making it easier to clean off.
Freezing method:
Place the grater in the freezer for about an hour. Once frozen, use a toothpick or small brush to scrape off the hardened lemon zest. Rinse the grater to remove any remaining residue.
Dishwasher cleaning:
If your grater is dishwasher-safe, simply place it in the dishwasher along with your regular load of dishes. The high water temperature and detergent will help remove the lemon zest effectively.
Citrus peel soak:
Fill a container with warm water and add some citrus peels, such as lemon or orange. Soak the grater in the mixture for 10-15 minutes. The natural oils from the peels will work to dissolve the sticky zest, making it easier to clean.
Steam cleaning:
Hold the grater over a pot of boiling water for a few minutes. The steam will loosen the lemon zest, allowing you to easily wipe it away with a cloth or sponge.
Baking soda paste:
Create a paste by mixing baking soda with a little water. Apply the paste to the grater and gently scrub it using a soft cloth or sponge. Rinse with warm water afterward.
Salt scrub:
Sprinkle some salt onto the grater and use a damp cloth or sponge to scrub it. The abrasive texture of the salt will help remove the lemon zest. Rinse the grater thoroughly when finished.
By exploring these alternative cleaning methods, you can keep your grater for lemon zest clean and ready for use in a breeze. Choose the method that suits you best and say goodbye to stubborn lemon residue!
Proper Storage Techniques To Prevent Damage And Maintain Cleanliness
Storing your grater properly is essential to ensure its longevity and maintain hygiene. Here are a few key points to consider:
Clean and dry: Before storing your grater, make sure it is thoroughly cleaned and dried to prevent any bacteria growth or odors.
Separate container: To avoid any mishaps or accidents, it is advisable to store your grater in a separate container or a designated area, away from other sharp kitchen tools.
Protective cover: Invest in a protective cover for your grater to shield it from dust, moisture, and potential damage. This will also help prevent accidental cuts when reaching into the utensil drawer.
Vertical position: Store your grater in a vertical position rather than lying flat. This will reduce the chance of accidental contact and minimize the risk of any damage to the grating surface.
Secure storage: Ensure that your grater is securely stored and not placed in a crowded drawer where it can easily get damaged or cause harm when reaching for it.
Hanging option: If you have limited space in your kitchen, consider hanging your grater on a hook or using a magnetic strip. This not only saves space but also provides easy access whenever you need it.
Avoid dishwasher: Though some graters are dishwasher safe, it is often better to handwash and carefully dry them to maintain their sharpness and prevent any potential rusting.
Regular maintenance: Periodically inspect your grater for any signs of wear and tear. If you notice any dull blades or rust, it may be time to replace it to ensure optimal performance.
Use a cutting board: When using your grater, place a cutting board or a container underneath to catch the grated lemon zest.
This will not only help keep your kitchen clean but also prevent any debris from getting lodged in the grater’s crevices.
Check before use: Before using your grater, always give it a quick inspection. Ensure it is clean, free from any food debris or residue, and in good working condition. This will contribute to a hassle-free and enjoyable grating experience.
By following these storage techniques, you can keep your grater in excellent condition, prolong its lifespan, and continue enjoying the delightful zesty flavor of lemon zest in your culinary creations.
Conclusion
Cleaning a grater after using it to zest lemons is an essential step to maintain its quality and prolong its lifespan. By following a few simple tips, you can easily clean your grater without any hassle. Firstly, use a soft brush or toothbrush to remove any residual zest from the grater’s surface.
Then, soak the grater in warm soapy water for a few minutes to loosen any stubborn debris. Gently scrub the grater using the brush to remove any remaining residue. Rinse thoroughly and dry it completely before storing it away. Remember, stainless steel graters can also be cleaned by rubbing a cut lemon or baking soda on the surface.
Regularly cleaning your grater will ensure that it remains safe, hygienic, and ready to use for your next lemon zest culinary adventure. Happy grating!